Avoid background boxes
Transparent artwork helps the transfer print only the design instead of a white or colored rectangle.

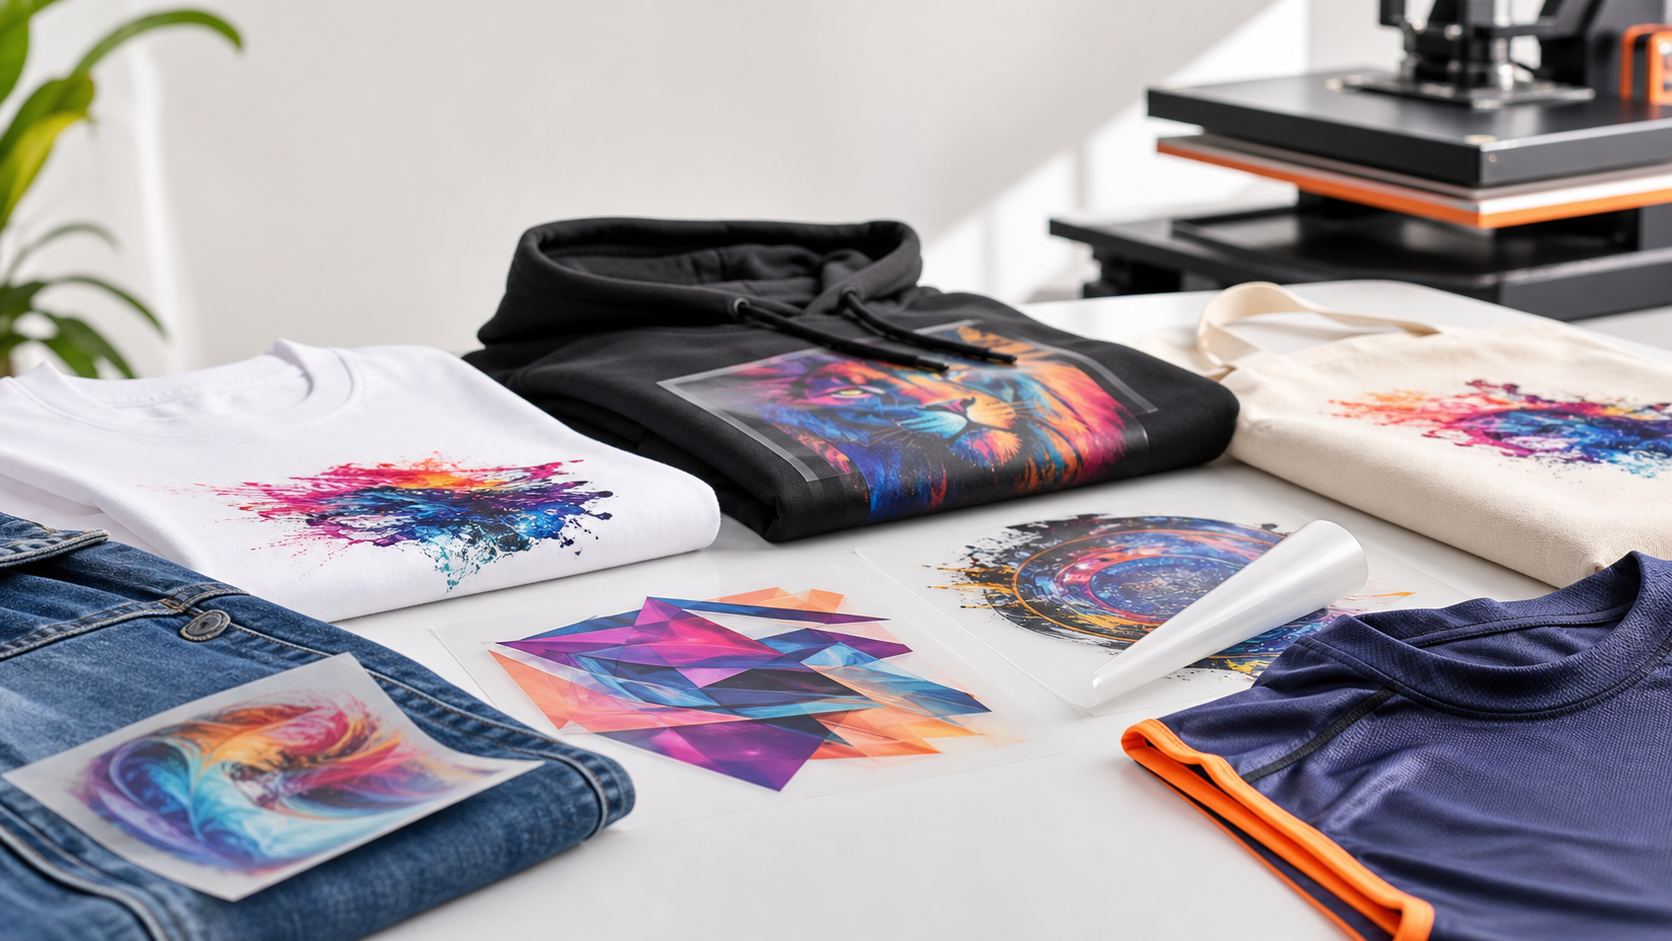
DTF artwork upload guide
Prepare your artwork for custom DTF transfers with transparent backgrounds, final sizing, and clean file setup.
Transparent artwork helps the transfer print only the design instead of a white or colored rectangle.
Artwork should be sized before upload so the transfer arrives ready to press.
Sharp files help preserve detail, edges, and small type during DTF printing.
File prep
Most DTF artwork problems come from backgrounds, low resolution, incorrect sizing, or small details that are hard to print cleanly. A transparent PNG at final print size gives the production team a clearer file and helps the transfer arrive closer to what you expect.
Before ordering, zoom in on the artwork, check all text, confirm the final size, and make sure there are no unwanted boxes or hidden background layers.
Checklist
Use a transparent file so only the artwork prints onto the film.
Resize the design to the real print size before uploading.
Review spelling, thin lines, distressing, and small elements before submitting.
Shop by need
FAQ
300 DPI at final print size is recommended because it helps produce cleaner detail and sharper edges.
If the white background is part of the file, it may print. Use a transparent background when you only want the design to transfer.
Check spelling, sizing, transparency, small text, thin lines, distressing, and whether the artwork is already at final print dimensions.
Choose your transfer format and upload a clean file for premium DTF printing.