Designed for fast production
DTF transfers are made to press quickly, peel hot, and move through repeat apparel runs efficiently.

DTF pressing guide
Learn the core pressing workflow for custom DTF transfers, from garment prep to hot peel and finishing press.
DTF transfers are made to press quickly, peel hot, and move through repeat apparel runs efficiently.
A short finishing press can help the transfer settle into the garment surface for a softer, cleaner result.
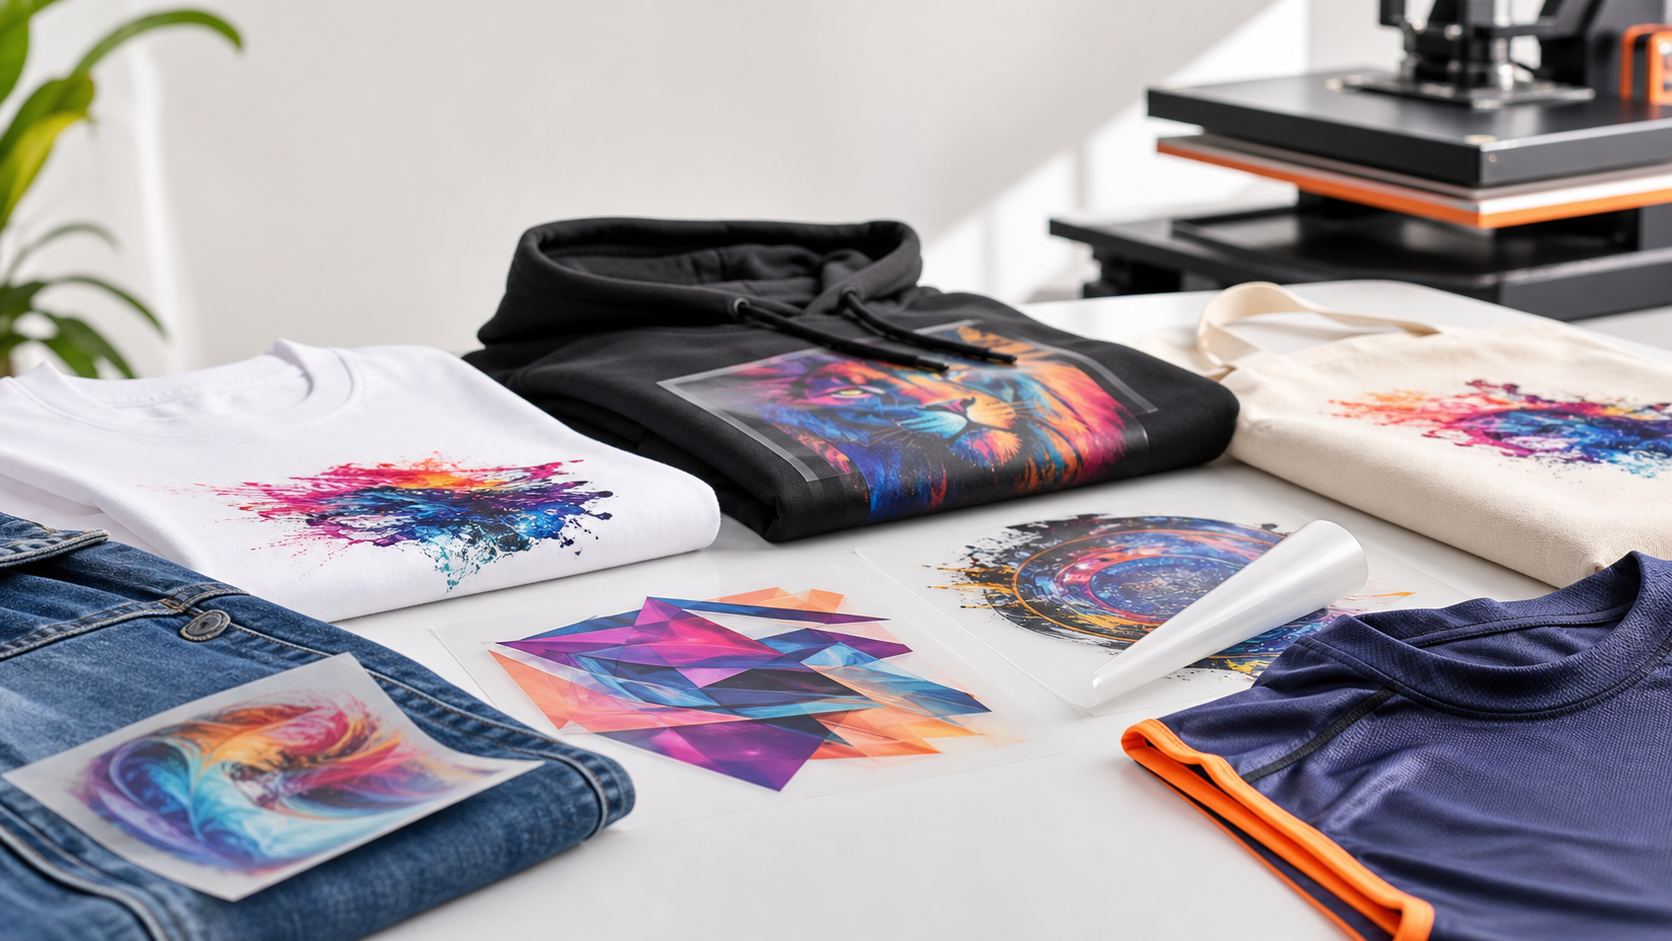
DTF is a strong option for cotton, polyester, blends, hoodies, totes, and many everyday apparel blanks.
Application basics
DTF transfers are popular because they are fast to apply and flexible across many apparel blanks. The best results come from a flat garment, accurate placement, even pressure, and a finishing press that helps the design feel smooth on the fabric.
Always use the instructions included with your transfer order, especially when changing fabrics or heat presses. Small differences in pressure, temperature, and garment material can affect the final result.
Pressing workflow
Remove moisture and flatten the print area before placing the transfer.
Use consistent pressure across the whole design and follow the temperature and time guidance included with the transfer.
Peel according to the transfer instructions, then finish with a brief repress using a cover sheet.
Shop by need
FAQ
Follow the instructions included with your order because press settings can vary by film, fabric, and heat press. Use even pressure and test when working with unfamiliar blanks.
A cover sheet is commonly used for the finishing press to protect the design and help create a smoother final texture.
Use proper press settings, apply even pressure, finish press when recommended, and follow basic garment care such as washing inside out and avoiding high heat drying when possible.
Order individual transfers or build a gang sheet, then press with a clean workflow for professional results.